This tutorial will explain how to create a stone-like texture using some filters, and a beveled style to place the texture on, in order to create a nice old-looking stone text effect.
The Final Result:

Notes:
* the software used in this tutorial is Adobe Photoshop CS5 Extended
* the size of the final result image is 1024 * 768
* the size of the final result image is 1024 * 768
Step 1:
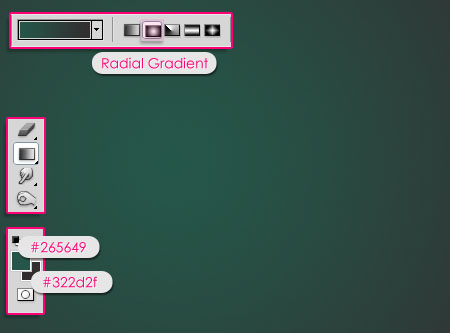
- Start by creating a Radial Gradient with the Foreground color set to #265649 and the Background color to #322d2f.
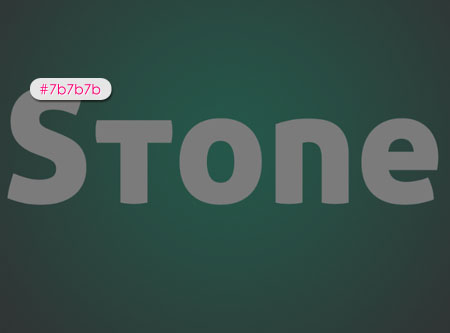
- Create the text using the color #7b7b7b. The font used is Aller Display, and the Size is 300px.
Step 2:
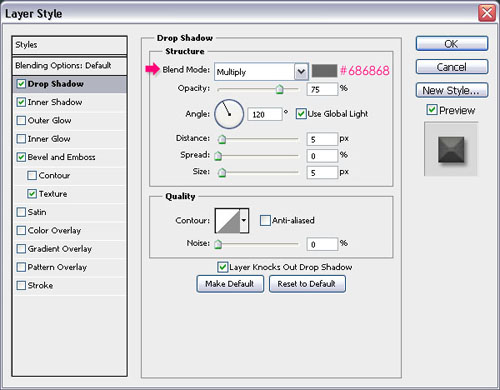
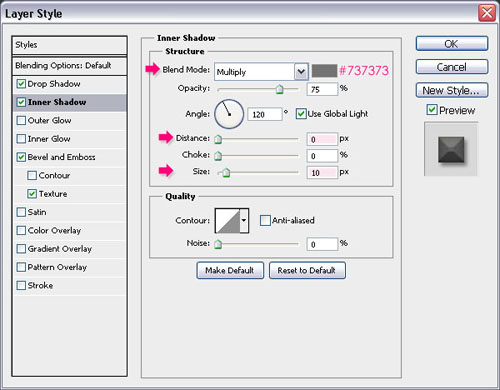
Double click on the text layer to apply the following styles:
- Drop Shadow: Just change the color to #686868.
- Inner Shadow: Change the color to #737373, the Distance to 0, and the Size to 10.
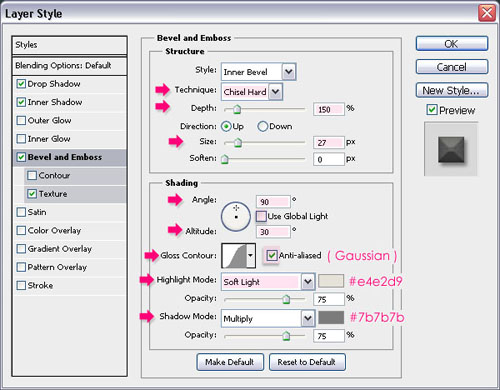
- Bevel and Emboss: Change the Technique to Chisel Hard, the Depth to 150, and the Size to 27. Remove the check next to Use Global Light, and change the Angle to 90and the Altitude to 30. Also, change the Gloss Contour to Gaussian, and check theAnti-aliased box. Finally, change the Highlight Mode to Soft Light, its color to#e4e2d9, and the Shadow Mode color to #7b7b7b.
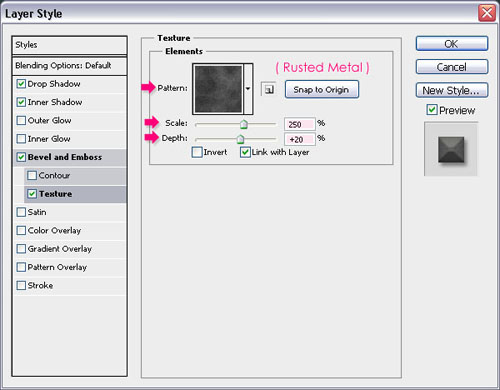
-Texture: Choose the Rusted Metal Pattern, change the Scale to 250, and the Depth to20.
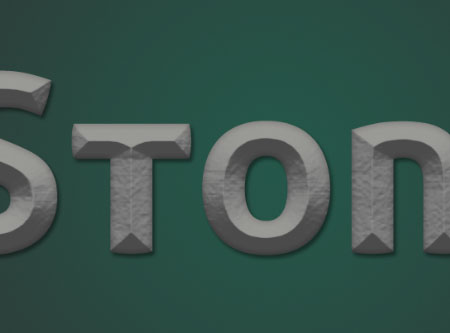
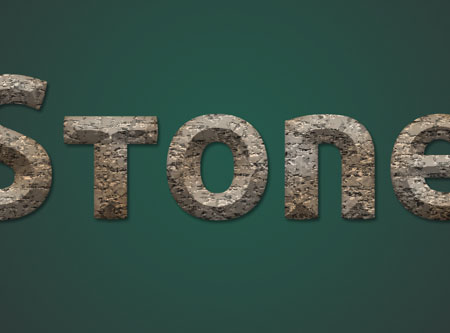
The text should look like this.
Step 3:
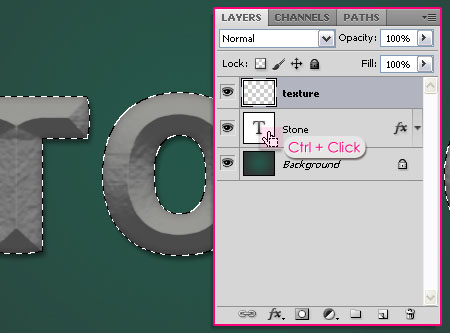
- Create a new layer on top of all layers, and call it “texture”. Press the Ctrl key, and click on the text layer’s thumbnail to create a selection.
- Set the Foreground color to #dadada and the Background color to #7d582e, then go toFilter -> Render -> Clouds. Press Ctrl + D to get rid of the selection.

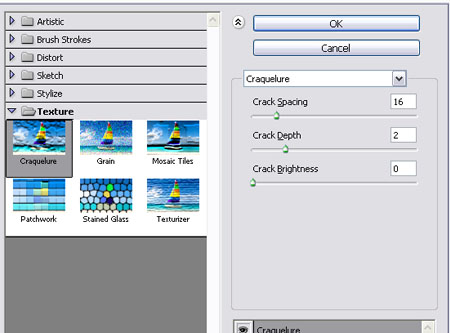
- Go to Filter -> Texture -> Craquelure, change the Crack Spacing to 16, the Crack Depth to 2, and the Crack Brightness to 0.
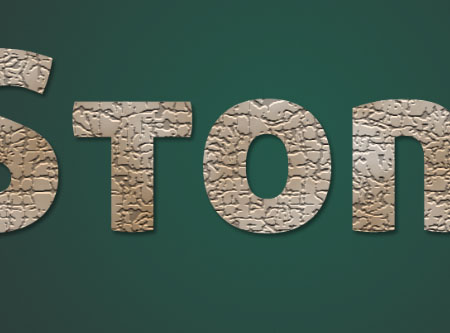
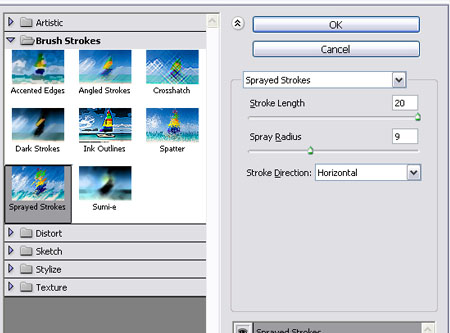
- Go to Filter -> Brush Strokes -> Sprayed Strokes, change the Stroke Length to 20, the Spray Radius to 9, and the Stroke Direction to Horizontal.
Step 4:
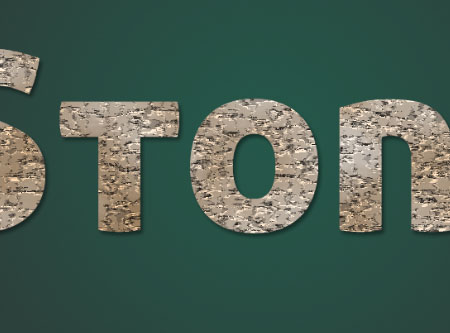
- Change the “texture” layer’s Blend Mode to Overlay, and the Fill value to 80%.
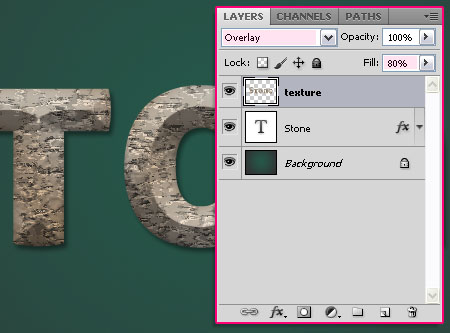
- Go to Image -> Adjustments -> Levels, or press Ctrl + L, and change the Shadowsvalue to 15, and the Gamma value to 0.80.
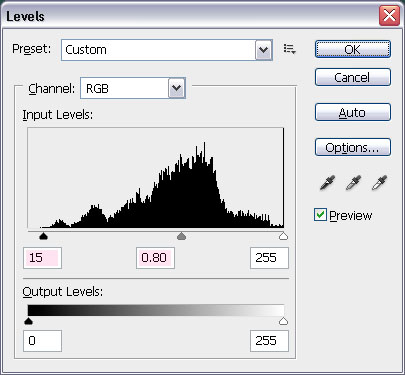
This will darken the colors a bit.
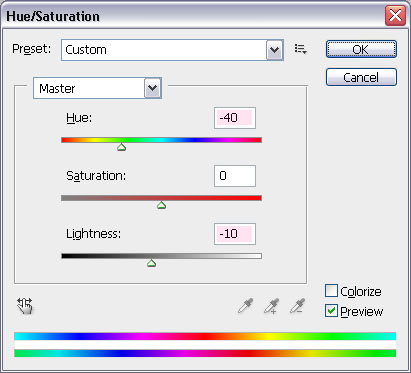
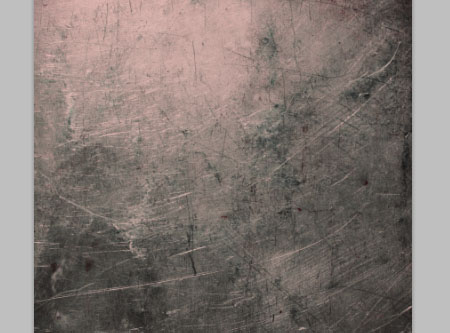
Step 5:
- Open the Grungy Texture Background and go to Image -> Adjustments -> Hue/Saturation, or press Ctrl + U. Change the Hue to -40, and the Lightness to -10.
- Duplicate the grungy background to your document, and place it on top of the Background layer immediately. Move it around or resize it as you like, then, change itsBlend Mode to Overlay.
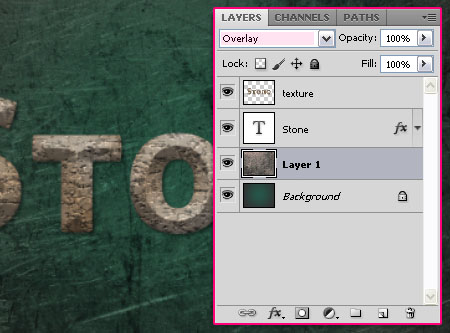
Step 6:
- Select the “texture” layer, and click on the New Adjustment Layer icon, and add aHue/Saturation adjustment layer on top of all layers.
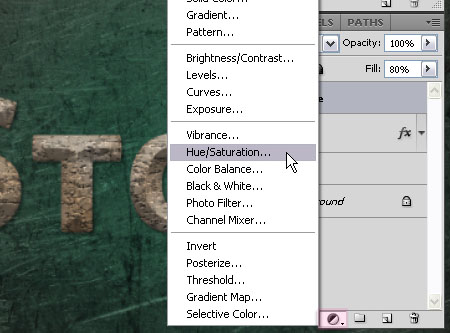
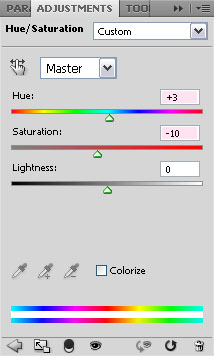
- Change the Hue value to +3, and the Saturation to -10. This will tone down the colors a bit.
- Once again, click on the New Adjustment Layer icon, and this time, add a Photo Filteradjustment layer on top of all layers.
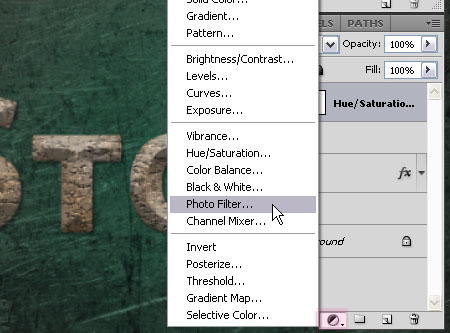
- Choose Deep Yellow from the Filter drop down menu, and change the Density to 20, or any other value you like.
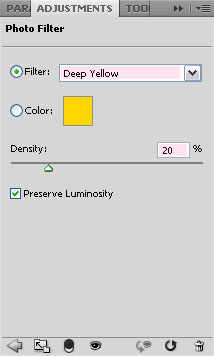
The adjustment layers give a nice color tone for the final image.
Step 7:
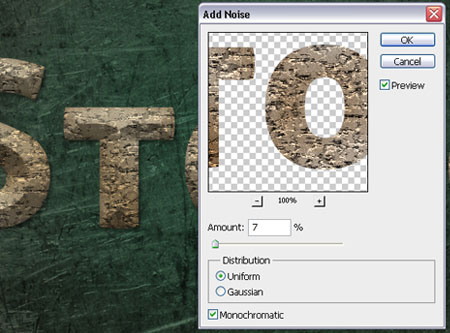
- This is optional, but it helps add more texture to the final effect. So select the “texture” layer once again, and go to Filter -> Noise -> Add Noise. Change the Amount to 7, theDistribution to Uniform, and check the Monochromatic box.
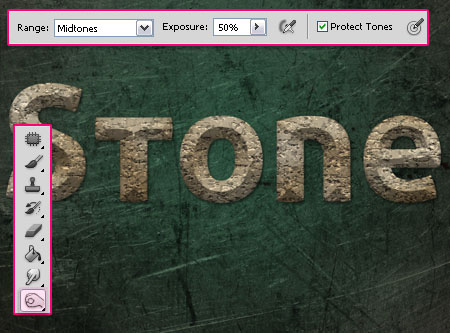
- You can also grab the Burn Tool, and darken some areas to add more depth.
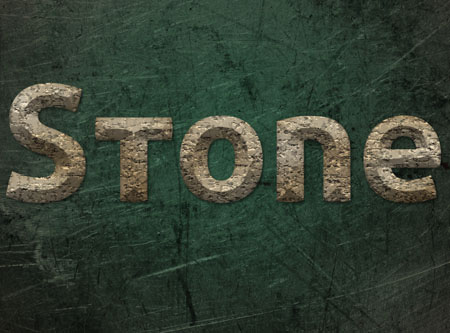
And this is the final effect.