Saturday, April 30, 2011

Implementing CSS - IV


There are 4 ways of implementing CSS: declare inlineembed into the head of your document, link to an external CSS file, importa CSS file.

Inline CSS

Style sheet information is applied to the current element. Instead of defining the style once, then applying the style against all instances of an element (say the <P> tag), you only apply the style to the instance you want the style to apply to.
For example:

<P style="color:#ff9900">
  CSS tutorial.
</p>

Embedded CSS

You embed CSS information into an HTML document using the 'style' element. You do this by embedding the CSS information within <style>...</style> tags in the head of your document.
For example, place the following code between the <head>...</head> tags of your HTML document:

<style type="text/css" media=screen>
p {color:#ff9900;}
</style>

Now, whenever any of those elements are used within the body of the document, they will be formatted as instructed in the above style sheet.

External CSS

An external style sheet is a separate file where you can declare all the styles that you want to use throughout your website. You then link to the external style sheet from all your HTML pages. This means you only need to set the styles for each element once. If you want to update the style of your website, you only need to do it in one place.
For example:
  1. Type the following into a plain text file, and save with a .css extension (i.e. external_style_sheet.css).
    
    p {font-family: georgia, serif; font-size: x-small;}
    h1 {color: #000099; }
    
    
  2. Add the following between the <head>...</head> tags of all HTML documents that you want to reference the external style sheet.
    
    <link rel="stylesheet" href="external_style_sheet.css" type="text/css">


Imported CSS

You can use the @import rule to import rules from other style sheets.
Add either of the following between the <head>...</head> tags of all HTML documents that you want to import a style sheet into.

@import "imported_style_sheet.css";
@import url("imported_style_sheet.css");

CSS Syntax - III


The CSS syntax consists of a set of rules. These rules have 3 parts: a selector, a property, and a value.
You don't need to remember this in order to code CSS. Once you start coding CSS, you'll do so without thinking "this is a selector" or "that is a property". This should begin to make sense once you study the examples on this page.
Syntax:
selector { property: value }
The selector is often the HTML element that you want to style. For example:
h1 { color: blue }
This code tells the browser to render all occurences of the HTML h1 element in blue.

Grouping Selectors

You can apply a style to many selectors if you like. Just separate the selectors with a comma.
h1,h2,h3,h4,h5,h6 { color: blue }

Applying Multiple Properties

To apply more than one property separate each declaration with a semi-colon.
h1 { color:blue; font-family:arial,helvetica,"sans serif" }

Readability

You can make your CSS code more readable by spreading your style declarations across multiple lines. You can also indent your code if you like. This doesn't affect how your code is rendered - it just makes it easier for you to read.
h1 {
 color:blue;
 font-family:arial,helvetica,"sans serif";
 font-size:150%;
}
OK, so you've now learned about the CSS syntax. But how do you incorporate this syntax into your website? The next lesson will show you how to incorporate CSS into your HTML documents.

CSS Advantages - II


HTML has its limitations when it comes to layout. Sure, you have 6 different levels of headings and 6 different sizes of fonts. You also have tables, and you have control over alignment etc. These are good enough to get a reasonable looking document that shows the true structure of information. However, it's a far cry from some of the excellent layout & design that we see in magazines and printed brochures etc.
CSS helps us achieve such layouts.
With CSS, you have much better control over the layout of your web pages. You can specify exactly how big a font will be, exactly where an element will be on a page, what the page will look like when printed, and much more.
CSS can also save you a lot of time, particularly when maintaining a large site. Also, the World Wide Web Consortium (W3C) recommends that web developers use CSS tags instead of HTML tags wherever possible. The W3C are gradually phasing out quite a few of these HTML tags.

Advantages of CSS

  • CSS saves time
    When most of us first learn HTML, we get taught to set the font face, size, colour, style etc every time it occurs on a page. This means we find ourselves typing (or copying & pasting) the same thing over and over again. With CSS, you only have to specify these details once for any element. CSS will automatically apply the specified styles whenever that element occurs.
  • Pages load faster
    Less code means faster download times.
  • Easy maintenance
    To change the style of an element, you only have to make an edit in one place.
  • Superior styles to HTML
    CSS has a much wider array of attributes than HTML.

Disadvantages of CSS

  • Browser compatibility
    Browsers have varying levels of compliance with Style Sheets. This means that some Style Sheet features are supported and some aren't. To confuse things more, some browser manufacturers decide to come up with their own proprietary tags.Fortunately, browser compatibility is becoming less of an issue as the latest browser versions are much more standards-compliant than their earlier counterparts.

CSS Tutorial - I


Cascading Style Sheets (CSS) have been seriously underated. Maybe it's because web designers think it's harder than what it is. The truth is, CSS is incredibly easy!
With CSS, you can define all your common styles in an external Style Sheet. This way, if you want to change every occurence of a style throughout your site, you only need to update one place.
This tutorial will show you how to implement CSS into your website. This tutorial will also show you how to create an external style sheet and link to it from your HTML page.

About CSS

What does CSS stand for?

CSS stands for Cascading Style Sheets.

What is CSS?

CSS is a language that you can use to define styles against any HTML element. These styles are set using CSS properties.For example, you can set font properties (size, colors, style etc), background images, border styles, and much more.
Cascading Style Sheets, level 1 (CSS1) became a W3C Recommendation in December 1996. It describes the CSS language as well as a simple visual formatting model. CSS2, which became a W3C recommendation in May 1998, builds on CSS1 and adds support for media-specific style sheets (e.g. printers and aural devices), downloadable fonts, element positioning and tables.
As of this writing, CSS3 is currently under development.

JavaScript Event Handlers


When your users visit your website, they do things like click on things, hover over things etc. These are examples of what JavaScript calls events. Using JavaScript, you can respond to an event using Event Handlers. You can attach an event handler to the HTML element for which you want to respond to when a specific event occurs. For example, you could attach JavaScript'sonMouseover event handler to a button and specify some JavaScript to run whenever this event occurs against that button.
The HTML 4 specification defines 18 event handlers as listed below:
Event HandlerEvent that it handles
onBlurUser has left the focus of the object. For example, they clicked away from a text field that was previously selected.
onChangeUser has changed the object, then attempts to leave that field (i.e. clicks elsewhere).
onClickUser clicked on the object.
onDblClickUser clicked twice on the object.
onFocusUser brought the focus to the object (i.e. clicked on it/tabbed to it)
onKeydownA key was pressed over an element.
onKeyupA key was released over an element.
onKeypressA key was pressed over an element then released.
onLoadThe object has loaded.
onMousedownThe cursor moved over the object and mouse/pointing device was pressed down.
onMouseupThe mouse/pointing device was released after being pressed down.
onMouseoverThe cursor moved over the object (i.e. user hovers the mouse over the object).
onMousemoveThe cursor moved while hovering over an object.
onMouseoutThe cursor moved off the object
onResetUser has reset a form.
onSelectUser selected some or all of the contents of the object. For example, the user selected some text within a text field.
onSubmitUser submitted a form.
onUnloadUser left the window (i.e. user closes the browser window).

JavaScript Date and Time Functions


JavaScript provides the following date and time functions. Note that UTC stands for Universal Coordinated Time which refers to the time as set by the World Time Standard. Previously referred to as Greenwich Mean Time or GMT.
FunctionDescriptionReturned Values
getDate()
getUTCDate()
Day of the month1-31
getDay()
getUTCDay()
Day of the week (integer)0-6
getFullYear()
getUTCFullYear()
Year (full four digit)1900+
getHours()
getUTCHours()
Hour of the day (integer)0-23
getMilliseconds()
getUTCMilliseconds()
Milliseconds (since last second)0-999
getMinutes()
getUTCMinutes()
Minutes (since last hour)0-59
getMonth()
getUTCMonth()
Month0-11
getSeconds()
getUTCSeconds()
Seconds (since last minute)0-59
getTime()Number of milliseconds since 1 January 1970 
getTimezoneOffset()Difference between local time and GMT in minutes0-1439
getYear()Year0-99 for years between 1900-1999
Four digit for 2000+
parse()Returns the number of milliseconds since midnight 1 January 1970 for a given date and time string passed to it. 
setDate()
setUTCDate()
Sets the day, given a number between 1-31Date in milliseconds
setFullYear()
setUTCFullYear()
Sets the year, given a four digit numberDate in milliseconds
setHours()
setUTCHours()
Sets the hour, given a number between 0-23Date in milliseconds
setMilliseconds()
setUTCMilliseconds()
Sets the milliseconds, given a numberDate in milliseconds
setMinutes()
setUTCMinutes()
Sets the minutes, given a number between 0-59Date in milliseconds
setMonth()
setUTCMonth()
Sets the month, given a number between 0-11Date in milliseconds
setSeconds()
setUTCSeconds()
Sets the seconds,l given a number between 0-59Date in milliseconds
setTime()Sets the date, given the number of milliseconds since 1 January 1970Date in milliseconds
setYear()Sets the year, given either a two digit or four digit numberDate in milliseconds
toGMTString()
toUTCString()
GMT date and time as a stringday dd mmm yyyy hh:mm:ss GMT
toLocaleString()Local date and time as a stringDepends on operating system, locale, and browser
toString()Local date and time as a stringDepends on operating system, locale, and browser
UTC()Returns the number of milliseconds since 1 January 1970 for a given date in year, month, day (and optionally, hours, minutes, seconds, and milliseconds)Date in milliseconds
valueOf()Number of milliseconds since 1 January 1970Date in milliseconds


JavaScript Reserved Words


You should avoid using these reserved words and keywords as function or variable names as JavaScript has reserved these words for its own use.
JavaScript Reserved Words
breakcontinuedoforimportnewthisvoid
casedefaultelsefunctioninreturntypeofwhile
commentdeleteexportiflabelswitchvarwith


Java Keywords (Reserved by JavaScript)
abstractimplementsprotected
booleaninstanceOfpublic
byteintshort
charinterfacestatic
doublelongsynchronized
falsenativethrows
finalnulltransient
floatpackagetrue
gotoprivate


JavaScript Summary - XXII


Pat yourself on the back - you've made it to the end of this tutorial!
This tutorial has demonstrated what JavaScript is and how it works. We started with the basics - like how to turn JavaScript on and off in your browser. We then quickly moved on to the basic syntax of JavaScript. We learned that you can include JavaScript within your HTML page, or you can place it in an external file - the choice is yours.
We learned about some of the key concepts of JavaScript and that these concepts are pretty standard across most programming/scripting languages - concepts such as operatorsvariables and functions. We learned that intrinsic events enable you run a script in response to a user's action.
We covered some more of the standard programming concepts such as if statements, switch statements and loops.
We learned how to catch an error and present a friendly message back to the user (so as to not scare them off).
Among the advanced topics were cookies, which enable us to "remember" a user by writing and reading a file on their hard drive. We learned how to present the date and time in a nice format, then finished off with arrays - another standard programming concept.

What Next?

If you think JavaScript is your thing, try checking out some of the code snippets here on Quackit such as Image Rollovers orDropdown Menu. There are also JavaScript references such as Reserved Words or Date and Time Functions.

InnerHTML In JavaScript - XXI


The innerHTML property can be used to modify your document's HTML on the fly.
When you use innerHTML, you can change the page's content without refreshing the page. This can make your website feel quicker and more responsive to user input.
The innerHTML property is used along with getElementById within your JavaScript code to refer to an HTML element and change its contents.
The innerHTML property is not actually part of the official DOM specification. Despite this, it is supported in all major browsers, and has had widespread use across the web for many years. DOM, which stands for Document Object Model, is the hierarchy that you can use to access and manipulate HTML objects from within your JavaScript.

The innerHTML Syntax

The syntax for using innerHTML goes like this:

Two Dimensional Arrays - XX


Visualizing Two Dimensional Arrays

Whereas, one dimensional arrays can be visualized as a stack of elements, two dimensional arrays can be visualized as a multicolumn table or grid.
For example, we could create a two dimensional array that holds three columns of data; a question, an answer, and a topic.
Two Dimensional Array
0ArraysWhat is an array?An ordered stack of data
1ArraysHow to create arrays?Assign variable name to array object, then assign values to the array.
2ArraysWhat are two dimensional arrays?An ordered grid of data

Creating Two Dimensional Arrays

JavaScript Arrays - XIX


What is an array?

Arrays are a fundamental part of most programming languages and scripting languages. Arrays are simply an ordered stack of data items with the same data type. Using arrays, you can store multiple values under a single name. Instead of using a separate variable for each item, you can use one array to hold all of them.
For example, say you have three Frequently Asked Questions that you want to store and write to the screen. You could store these in a simple variable like this:
faqQuestion1 = "What is an array?"
faqQuestion2 = "How to create arrays in JavaScript?"
faqQuestion3 = "What are two dimensional arrays?"
This will work fine. But one problem with this approach is that you have to write out each variable name whenever you need to work with it. Also, you can't do stuff like loop through all your variables. That's where arrays come into play. You could put all your questions into one array.

JavaScript Date and Time - XVIII


JavaScript provides you with the ability to access the date and time of your users' local computer, which can be quite useful at times. Displaying the current date and time in a nice user friendly way using JavaScript is not quite as simple as you might like. You need to massage the data a little.

Displaying the Current Date

Typing this code...
var currentDate = new Date()
  var day = currentDate.getDate()
  var month = currentDate.getMonth()
  var year = currentDate.getFullYear()
  document.write("<b>" + day + "/" + month + "/" + year + "</b>")

JavaScript Cookies - XVII


Cookies are small text files that sit on your hard disk. Cookies are created when you visit websites that use cookies to store information that they need (or prefer). Websites often use cookies to personalise the user experience - such as remembering your name (assuming you supplied it previously) or remembering the items in your shopping cart from previous visits.
Despite the many misconceptions about cookies being malicious, they are quite harmless. Cookies can't give your personal details to other websites, or transmit a virus or anything like that. A cookie can only be read by the server that created it. Websites normally use cookies to make its users' lives easier, not harder.

Creating Cookies in JavaScript

JavaScript Void(0) - XVI


Sometimes, you may need to call some JavaSript from within a link. Normally, when you click a link, the browser loads a new page (or refreshes the same page).
This might not always be desirable. For example, you might only want to dynamically update a form field when the user clicks a link.
To prevent the load from refreshing, you could use the JavaScript void() function and pass a parameter of 0 (zero).

Example of void(0):

We have a link that should only do something (i.e. display a message) upon two clicks (i.e. a double click). If you click once, nothing should happen. We can specify the double click code by using JavaScript's "ondblclick" method. To prevent the page reloading upon a single click, we can use "JavaScript:void(0);" within the anchor link.
Code:

JavaScript Escape Characters - XV


When working with strings, you'll notice there are some characters that always seem to break your program. These include apostrophes, ampersands, double quotes etc.
When working with these characters, you need to use what is known as an "escape character". An escape character enables you to output characters you wouldn't normally be able to, usually because the browser will interpret it differently to what you intended.
In JavaScript, the backslash (\) is an escape character.
As an example, let's say I want to display the following text: They call it an "escape" character. Let's try that without an escape character:

Without an escape character:

JavaScript Try... Catch - XIV


The more JavaScript you code the more errors you'll encounter. This is a fact of life in any programming environment. Nobody's perfect and, once your scripts become more complex, you'll find there are sometimes scenarios that result in an error that you didn't think of.
JavaScript errors on web pages can scare your visitors away. How many times have you encountered a web page with errors, only to click the "back" button?
OK, so you can't always prevent errors from occuring, but you can do something about them. The JavaScript "Try... Catch" statement helps you handle errors in a "nice" way.
To use the Try... Catch statement, you take any code you think could potentially result in an error, and wrap it within the "try" statement. You then code what you want to happen in the event of an error and wrap that in a "catch" statement.

Code without a Try... Catch statement:

JavaScript While Loop - XIII


In JavaScript and most other languages, "loops" enable your program to continuously execute a block of code for a given number of times, or while a given condition is true.
The JavaScript While loop executes code while a condition is true.
For example, you could make your program display a the value of a counter while the count is less than or equal to say, 10.

Example While statement:

JavaScript Switch Statement - XII


In the previous lesson about JavaScript If statements, we learned that we can use an If Else If statement to test for multiple conditions, then output a different result for each condition.
For example, if the variable "myColor" was equal to "Blue", we could output one message. If it is "Red" we could output another etc
Another way of doing this is to use the JavaScript Switch statement. An advantage of using the switch statement is that it uses less code, which is better if you have a lot of conditions that you need to check for.

Example Switch statement:

JavaScript If Statements - XI

When you write code, you will often need to use conditional statements.

A conditional statement refers to a piece of code that does one thing based on one condition, and another based on another condition. In fact, you could have as many conditions as you like.

JavaScript If statements are an example of conditional statements. With If statements, you can tell the browser to execute a piece of code only if a given condition is true.

JavaScript Events - X


In the previous lesson, we used an event handler to trigger off a call to our function. There are 18 event handlers that you can use to link your HTML elements to a piece of JavaScript.
When you write a JavaScript function, you will need to determine when it will run. Often, this will be when a user does something like click or hover over something, submit a form, double clicks on something etc.
These are examples of events.
Using JavaScript, you can respond to an event using event handlers. You can attach an event handler to the HTML element for which you want to respond to when a specific event occurs.
For example, you could attach JavaScript's onMouseover event handler to a button and specify some JavaScript to run whenever this event occurs against that button.

JavaScript Functions - IX


In JavaScript, you will use functions a lot. A function (also known as a method) is a self-contained piece of code that performs a particular "function". You can recognise a function by its format - it's a piece of descriptive text, followed by open and close brackets.
Sometimes there will be text in between the brackets. This text is known as an argument. An argument is passed to the function to provide it with further info that it needs to process. This info could be different depending on the context in which the function is being called.

JavaScript Variables - VIII


Like other programming languages, JavaScript variables are a container that contains a value - a value that can be changed as required.
For example, you could prompt your website users for their first name. When they enter their first name you could store it in a variable called say, firstName. Now that you have the user's first name assigned to a variable, you could do all sorts of things with it like display a personalised welcome message back to the user for example. By using a variable to store the user's first name, you can write one piece of code for all your users.

Declaring JavaScript variables

JavaScript Operators - VII


JavaScript operators are used to perform an operation. There are different types of operators for different uses.
Below is a listing of JavaScript operators and a brief description of them. Don't worry if you don't understand all of them at this stage - just bookmark this page for reference and return whenever you need to.

Artithmetic Operators

External JavaScript File - VI


You can place all your scripts into an external file (with a .js extension), then link to that file from within your HTML document. This is handy if you need to use the same scripts across multiple HTML pages, or a whole website.
To link to an external JavaScript file, you add a src attribute to your HTML script tag and specify the location of the external JavaScript file.

Linking to an external JavaScript file

JavaScript and HTML - V


In previous lessons, we've learned about the syntax of JavaScript, but we haven't yet learned how to "attach" the JavaScript to our HTML elements. That's what I'll show you in this lesson.

Standalone JavaScript

First, let's look at what a standalone piece of JavaScript looks like.

JavaScript Popup Boxes - IV


You've probably encountered JavaScript popup boxes many times while visiting websites. Now, I don't mean "popup windows" - we'll cover that later. What I mean is, a popup box that displays a message, along with an "OK" button. Depending on the popup box, it might also have a "Cancel" button, and you might also be prompted to enter some text. These are all built into JavaScript and are what I call "JavaScript popup boxes". They can also referred to as "dialog boxes", "JavaScript dialogs", "popup dialog" etc.

Types of Popups

JavaScript has three different types of popup box available for you to use. Here they are:

Alert

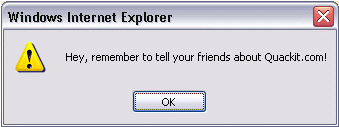
Displays a message to the user. Example:
Screenshot of a JavaScript alert box

Confirm

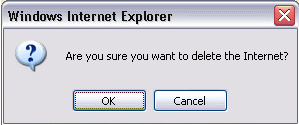
Asks the user to confirm something. Often, this is in conjunction with another (potentially significant) action that the user is attempting to perform. Example:
Screenshot of a JavaScript confirm box

Prompt

Prompts the user for information. Example:
Screenshot of a JavaScript prompt box

Popup Code

Here's the syntax for specifying popup boxes, along with some examples.
Type of PopupSyntaxExample Code
Alertalert("Message");alert("Hey, remember to tell your friends about onlinetaleem.blogspot.com!");
Confirmconfirm("Message");confirm("Are you sure you want to delete the Internet?");
Promptprompt("Message","Default response");prompt('Please enter your favorite website', 'onlinetaleem.blogspot.com');
Note that the user's browser determines what the popup box actually looks like. This is because our popup code is simply telling the browser to "display this type of popup with this message". It is up to the browser to render the correct type of popup with the specified message.

Integating JavaScript with HTML

You will have noticed that the (above) example popups didn't appear as soon as you loaded this page. They only appeared after you clicked the relevant button. This is because I placed code into each HTML button, so that when it was clicked, it triggered off our JavaScript.
This is a very common way of using JavaScript on the web. By "attaching" JavaScript to our HTML elements, we can make our pages much more responsive to our users' actions.
The following lesson explains this in more detail.

JavaScript Syntax - III


What does JavaScript syntax mean? JavaScript syntax refers to a set of rules that determine how the language will be written (by the programmer) and interpreted (by the browser).
The JavaScript syntax is loosely based on the Java syntax. Java is a full blown programming environment and JavaScript could be seen as a sub-set of the Java syntax. Having said this, that is where the similarities end - Java and JavaScript are two totally different things.
In learning JavaScript you will become familiar with terms such as variablesfunctionsstatementsoperatorsdata typesobjectsetc.
It will take most of this tutorial to show you the complete JavaScript syntax. For now, I'll give you a quick intro by showing you an example and explanation.

Example code

How to enable JavaScript - II


To view webpages with JavaScript, you need to ensure your browser has JavaScript enabled. Generally speaking, you can still view the webpage without JavaScript, but you will not be able to take advantage of the JavaScript functionality.

How do I check if my browser has JavaScript enabled?

You normally do this by checking your browser's options. This will depend on the browser you're using. Instructions for some of the more common browsers are below:

Internet Explorer (6.0):

Introduction to JavaScript - I


If you're new to programming/scripting, JavaScript is a good place to start. Having said that, it's still quite different to HTML so I recommend you take your time and cover off a little bit each day. Don't worry if it takes you several days to complete - it's better to fully understand everything than to brush over it and not fully comprehend it.
I suggest you bookmark this tutorial now, then continue on.

What is JavaScript?


Friday, April 29, 2011

HTML Scripts - XVIII


script is a small, embedded program that can add interactivity to your website. For example, a script could generate a pop-up alert box message, or provide a dropdown menu.
Because HTML doesn't actually have scripting capability, you need to use the <script> tag to generate a script, using a scripting language.
The <script> tags tell the browser to expect a script in between them. You specify the language using the type attribute. The most popular scripting language on the web is JavaScript.

Adding a Script

You can specify whether to make a script run automatically (as soon as the page loads), or after the user has done something (like click on a link).
In either case, a generally accepted convention is to place your scripts between the <head></head> tags. This ensures that the script is ready to run when it is called.
HTML Code:

<script type="text/javascript">
 alert("I am a script. I ran first!")
</script>

Triggering a Script

In many cases, you won't want the script to run automatically. You might only want the script to run if the user does something (like hover over a link), or once the page has finished loading.
These actions are called intrinsic events (events for short). There are 18 pre-defined intrinsic events that can trigger a script to run. You use event handlers to tell the browser which event should trigger which script. These are specified as an attribute within the HTML tag.
Lets say you want a message to display in the status bar whenever the user hovers over a link. The act of hovering over the link is an event which is handled by the onmouseover event handler. You add the onmouseover attribute to the HTML tag to tell the browser what to do next.
HTML Code:
Treat yourself to a <a href="http://www.great-workout.com/killer-ab-workout.cfm"onMouseover="window.status='Go on, you know you want to'; return true">Killer Ab Workout</a>
This results in:
Treat yourself to a Killer Ab Workout
Status bar messages aren't supported by all browsers. If you see no change to the status bar, it's likely that your browser doesn't support this piece of JavaScript.
Before we move on, check out the list of intrinsic events as specified by HTML 4.01

Calling an External Script

You can also place your scripts into their own file, then call that file from your HTML document. This is useful if you want the same scripts available to multiple HTML documents - it saves you from having to "copy and paste" the scripts into each HTML document. This makes it much easier to maintain your website.
HTML Code:
<script type="text/javascript" src="external_scripts.js"></script>

Hide Scripts from Older Browsers

Athough most (if not all) browsers these days support scripts, some older browsers don't. If a browser doesn't support JavaScript, instead of running your script, it would display the code to the user. To prevent this from happening, you can simply place HTML comments around the script. Older browsers will ignore the script, while newer browsers will run it.
HTML Code:

<script type="text/javascript">
   <-- Hide from older browsers
    alert("I am a script. I ran first!")
    Unhide -->
</script>

Alternate Information for Older Browsers

You can also provide alternative info for users whose browsers don't support scripts (and for users who have disabled scripts). You do this using the <noscript> tag.
HTML Code:

<script type="text/javascript">
   <-- Hide from older browsers
    alert("I am a script. I ran first!")
    Unhide -->
</script>

<noscript>
You need JavaScript enabled to view this page.
</noscript>

Set a Default Scripting Language

You can specify a default scripting language for all your script tags to use. This saves you from having to specify the language everytime you use a script tag within the page.
HTML Code:

<meta http-equiv="Content-Script-Type" content="text/JavaScript" />
Note that you can still override the default by specifying a language within the script tag.

HTML Styles - XVII


HTML is quite limited when it comes to the appearance of its elements. This is not so good if you're trying to give a website a unique look and feel, or you're trying to adhere to a corporate identity.
But, never fear - CSS is here!
CSS stands for Cascading Style Sheets, and its purpose is to enable web authors/designers to apply styles across their websites. With CSS, you can specify a number of style properties for a given HTML element. Each property has a name and a value, separated by a colon (:). Each property declaration is separated by a semi-colon (;).

Example of Style Sheet Usage

HTML Code:
<p style="color:olive;font-size:24px;">HTML Styles with CSS</p>

This results in:
HTML Styles with CSS
The above code is an example of inline styles. It is called inline because we declared the styles within the HTML tag itself. We could also use embedded styles or even external styles.
Embedded styles refers to declaring all styles in one place (usually the head of the document). Each element then knows to use the style that was previously declared.
External styles refers to creating a separate file that contains all style information. This file is then linked to from as many HTML pages as you like - even the whole site.

HTML Layouts - XVI


You may have noticed that many websites have multiple columns in their layout - they are formatted like a magazine or newspaper. Many websites achieved this HTML layout using tables.

HTML layout with tables

Tables have been a popular method for achieving advanced layouts in HTML. Generally, this involves putting the whole web page inside a big table. This table has a different column or row for each main section.
For example, the following HTML layout example is achieved using a table with 3 rows and 2 columns - but the header and footer column spans both columns (using the colspan attribute):
This HTML code...

<table width="400px" border="0">
  <tr>
    <td colspan="2" style="background-color:yellow;">
      Header
    </td>
  </tr>
  <tr>
    <td style="background-color:orange;width:100px;text-align:top;">
      Left menu<br />
      Item 1<br />
      Item 2<br />
      Item 3...
    </td>
    <td style="background-color:#eeeeee;height:200px;width:300px;text-align:top;">
      Main body
    </td>
  </tr>
  <tr>
    <td colspan="2" style="background-color:yellow;">
      Footer
    </td>
  </tr>
</table>
produces this layout...
Header
Left menu
Item 1
Item 2
Item 3...
Main body
Footer

HTML layout with DIV, SPAN and CSS

Although we can achieve pretty nice layouts with HTML tables, tables weren't really designed as a layout tool. Tables are more suited to presenting tabular data.
The div element is a block level element used for grouping HTML elements. Once grouped, formatting can be applied to the div element and everything contained within it. While the div tag is a block-level element, the HTML span element is used for grouping elements at an inline level.
Using our previous HTML layout, we can use DIV and CSS to achieve a similar effect. The following code...

<div style="width:400px">
  <div style="background-color:yellow">
    Header
  </div>
  <div style="background-color:orange;height:200px;width:100px;float:left;">
    Left menu<br />
    Item 1<br />
    Item 2<br />
    Item 3...
  </div>
  <div style="background-color:#eeeeee;height:200px;width:300px;float:right;">
    Main body
  </div>
  <div style="background-color:yellow;clear:both">
    Footer
  </div>
</div>
produces this layout...
Header
Left menu
Item 1
Item 2
Item 3...
Main body
Footer
One change to this that I'd recommend is that you place the CSS into an external style sheet.
One major benefit of using CSS is that, if you place your CSS in a separate location (i.e. an external style sheet), your site becomes much easier to maintain.

Advanced Layouts

As you build more websites you'll be able to develop more advanced layouts.
Because advanced layouts take time to create, a quicker option is to use a template. Web templates are basically a pre-built website that enables you to customize as required.

HTML Entities - XV


HTML entities (also known as character entity references) enable you to use characters that aren't supported by the document's character encoding or your keyboard. For example, you can type &copy; to output a copyright symbol.
You can also use numeric character references. Numeric character references can be defined with either a decimal or hexadecimal value (although decimal is more common). The numeric character reference for the copyright symbol is &#169; (decimal) and&#xA9; (hexadecimal).
A key benefit that numeric character references have over entities is that they can be used to specify any unicode character, whereas entities can only specify some.

Entity Example

Many web developers use entities for outputing HTML code to the browser (or at least, outputing one of the characters used by the HTML language).
Lets say you have a website about web design. And lets say you want to display the tag required for creating a horizontal rule 20% wide. Well, if you type the tag (<hr width="20%" />) into your code, the browser is simply going to render it as it should be (rather than output the actual code example). Like this...

... you see, instead of displaying the code, the browser rendered the code.
What you should have typed in is this:
&lt;hr width="50%" /&gt;
The &lt; replaces the < and the &gt; replaces the >.

HTML Frames - XIV


In HTML, frames enable you present multiple HTML documents within the same window. For example, you can have a left frame for navigation and a right frame for the main content.
Frames are achieved by creating a frameset page, and defining each frame from within that page. This frameset page doesn't actually contain any content - just a reference to each frame. The HTML frame tag is used to specify each frame within the frameset. All frame tags are nested with a frameset tag.
So, in other words, if you want to create a web page with 2 frames, you would need to create 3 files - 1 file for each frame, and 1 file to specify how they fit together.

Creating Frames

Two Column Frameset

HTML Code:
The frameset (frame_example_frameset_1.html):

<html>
<head>
<title>Frameset page<title>
</head>
<frameset cols = "25%, *">
  <frame src ="frame_example_left.html" />
  <frame src ="frame_example_right.html" />
</frameset>
</html>
The left frame (frame_example_left.html):

<html>
<body style="background-color:green">
<p>This is the left frame (frame_example_left.html).</p>
</body>
</html>
The right frame (frame_example_right.html):

<html>
<body style="background-color:yellow">
<p>This is the right frame (frame_example_right.html).</p>
</body>
</html>

Add a Top Frame

You can do this by "nesting" a frame within another frame.
HTML Code:
The frameset (frame_example_frameset_2.html):

<html>
<head>
<title>Frameset page</title>
</head>
<frameset rows="20%,*">
  <frame src="/html/tutorial/frame_example_top.html">
<frameset cols = "25%, *">
  <frame src ="/html/tutorial/frame_example_left.html" />
  <frame src ="/html/tutorial/frame_example_right.html" />
</frameset>
</frameset>
</html>
The top frame (frame_example_top.html):

<html>
<body style="background-color:maroon">
<p>This is the Top frame (frame_example_top.html).</p>
</body>
</html>
(The left and right frames don't change)

Remove the Borders

You can get rid of the borders if you like. Officially, you do this using frameborder="0". I say, officially because this is what the HTML specification specifies. Having said that, different browsers support different attributes, so for maximum browser support, use the frameborderborder, and framespacing attributes.
HTML Code:
The frameset (frame_example_frameset_3.html):

<html>
<head>
<title>Frameset page</title>
</head>
<frameset border="0" frameborder="0" framespacing="0" rows="20%,*">
  <frame src="/html/tutorial/frame_example_top.html">
<frameset cols = "25%, *">
  <frame src ="/html/tutorial/frame_example_left.html" />
  <frame src ="/html/tutorial/frame_example_right.html" />
</frameset>
</frameset>
</html>
(The left, right, and top frames don't change)

Load Another Frame

Most websites using frames are configured so that clicking a link in one frame loads another frame. A common example of this is having a menu in one frame, and the main body in the other (like our example).
This is achieved using the name attribute. You assign a name to the target frame, then in your links, you specify the name of the target frame using the target attribute.
Tip: You could use base target="content" at the top of your menu file (assuming all links share the same target frame). This would remove the need to specify a target frame in each individual link.
HTML Code:
The frameset (frame_example_frameset_4.html):

<html>
<head>
<title>Frameset page</title>
</head>
<frameset border="0" frameborder="0" framespacing="0" cols = "25%, *">
  <frame src ="/html/tutorial/frame_example_left_2.html" />
  <frame name="content" src ="/html/tutorial/frame_example_yellow.html" />
</frameset>
</html>
The left frame (frame_example_left_2.html):

<html>
<body style="background-color:green">
<p>This is the left frame (frame_example_left_2.html).</p>
<p>
<a target="content" href="frame_example_yellow.html">Yellow</a><br />
<a target="content" href="frame_example_lime.html">Lime</a>
</p>
</body>
</html>
The yellow frame (frame_example_yellow.html):

<html>
<body style="background-color:yellow">
<p>This is the yellow frame (frame_example_yellow.html).</p>
</body>
</html>
The lime frame (frame_example_lime.html):

<html>
<body style="background-color:Lime">
<p>This is the lime frame (frame_example_lime.html).</p>
</body>
</html>

Tag Reference

Here's some more info on the above tags.

The frameset Tag

In your frameset tag, you specify either cols or rows, depending on whether you want frames to go vertically or horizontally.
AttributeDescription
rowsSpecifies the number of rows and their height in either pixels, percentages, or relative lengths. Default is 100%
colsSpecifies the number of columns and their width in either pixels, percentages, or relative lengths. Default is 100%

The frame Tag

For each frame you want to display, you specify a frame tag. You nest these within the frameset tag.
AttributeDescription
nameAssigns a name to a frame. This is useful for loading contents into one frame from another.
longdescA long description - this can elaborate on a shorter description specified with the title attribute.
srcLocation of the frame contents (for example, the HTML page to be loaded into the frame).
noresizeSpecifies whether the frame is resizable or not (i.e. whether the user can resize the frame or not).
scrollingWhether the frame should be scrollable or not (i.e. should scrollbars appear). Possible values:
  • auto
  • yes
  • no
frameborderWhether the frame should have a border or not. Possible values:
  • 1 (border)
  • 0 (no border)
marginwidthSpecifies the margin, in pixels, between the frame's contents and it's left and right margins.
marginheightSpecifies the margin, in pixels, between the frame's contents and it's top and bottom margins.

The noframe Tag

The noframes tag is used if the user's browser doesn't support frames. Anything you type in between the noframes tags is displayed in their browser.
HTML Code:

<html>
<head>
<title>Frameset page<title>
</head>
<frameset cols = "25%, *">
  <noframes>
  <body>Your browser doesn't support frames.
  Therefore, this is the noframe version of the site.</body>
  </noframes>
  <frame src ="frame_example_left.html" />
  <frame src ="frame_example_right.html" />
</frameset>
</html>